Logo, colour & surface finish

Drinkware customization

Drinkware customization adds a logo, colour or texture to a selected tumbler or bottle. BG Drinkware offers 13 decoration options—compare laser engraving, screen printing, UV printing, dye sublimation and other finishes against the product, artwork and intended use, then approve the complete decorated sample before bulk production. Compatibility and timing need project-specific confirmation. Laser · Sublimation · Sampling · RFQ.
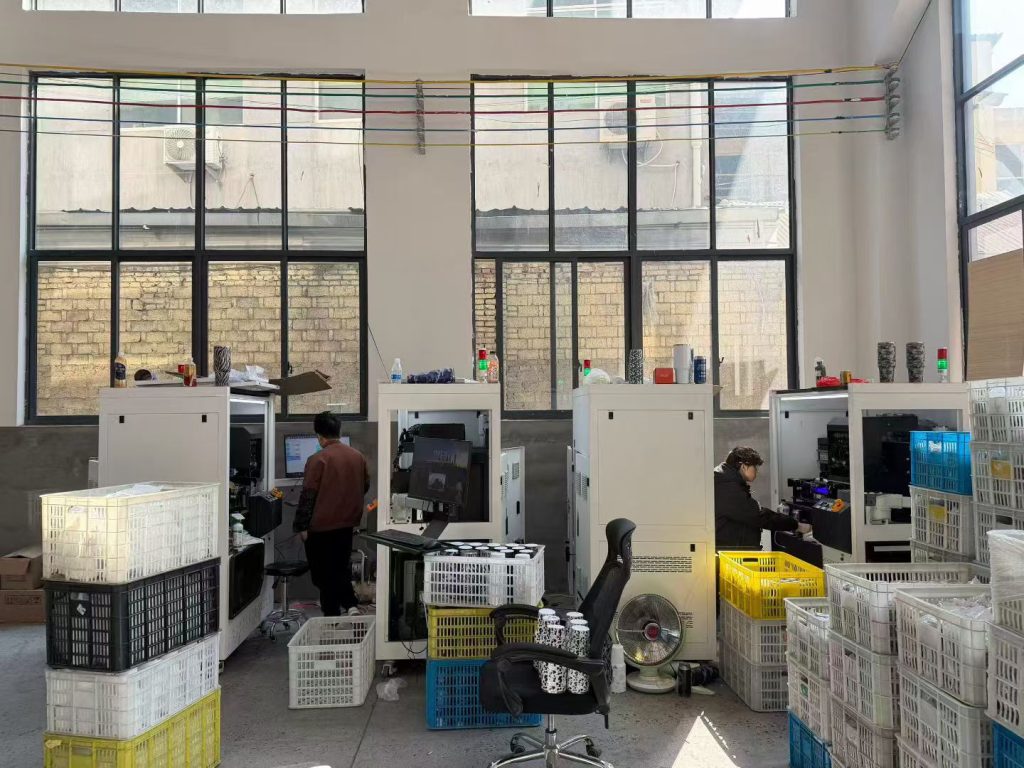
Operators at drinkware decoration workstations
Decoration workstations for drinkware logos and surface finishes.

Choose the outcome first

A logo, a colour and a texture are different decisions.

For custom tumblers with a logo, separate the base finish from the decoration method. A metallic mark, a photographic wrap and a textured surface solve different design needs. Choose the product body first, then compare processes against its material and surface. A new shape or lid structure needs a separate product development review.

Artwork

What needs to be seen?

Define logo size, colour count, fine detail and coverage. A small mark on one face is a different brief from artwork that wraps around the body.

Surface

What should it look and feel like?

Specify the base colour, gloss and texture separately. A matching colour alone does not confirm the sheen, tactile feel or contrast behind a logo.

Use

What must the sample withstand?

Describe handling, cleaning and packaging. Agree the checks before sampling; appearance in a photograph is not proof of wear or wash performance.

The process library

13 ways to shape the finished result.

Compare logo and pattern methods, colour coatings and textured finishes. Check each option against your product and artwork, then review any combined processes on the complete decorated sample.

13 optionsSkip to comparison ↓

New to decoration terms? Read the six-term glossary →

Choose how the artwork becomes part of the surface.
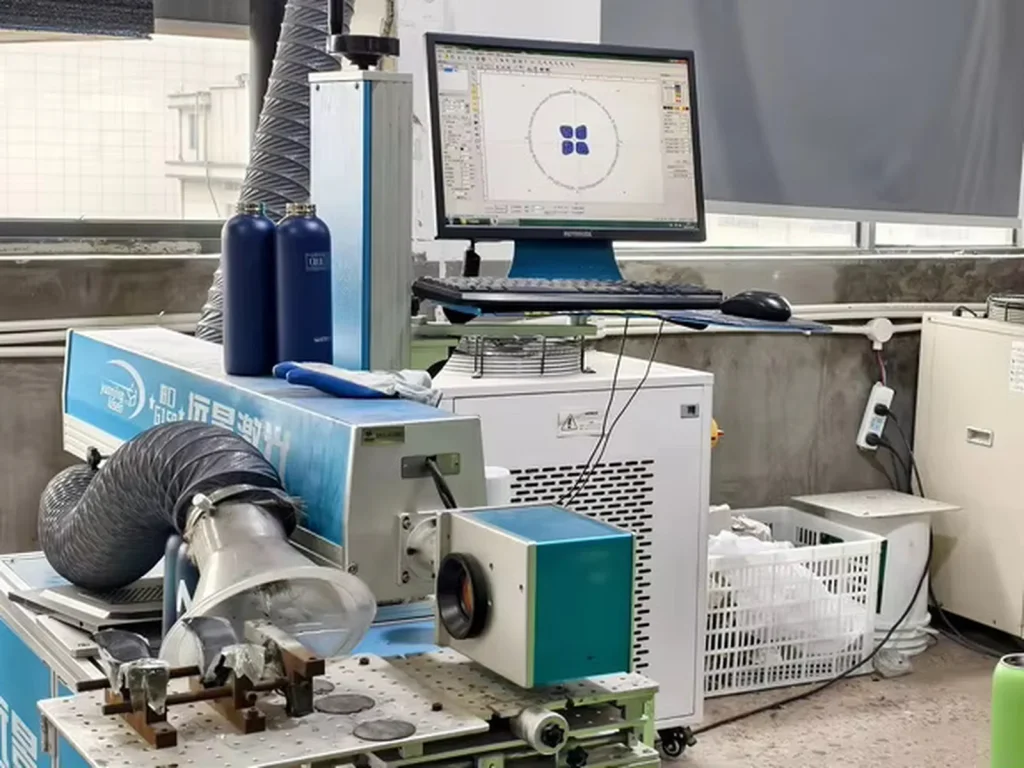
Drinkware laser marking workstation with rotary fixture and extraction hose

Laser Engraving

Reveal a contrasting mark for logos and line artwork without adding a printed colour layer. See laser-engravable tumbler buyer notes for contrast and blank selection.
Fit, limits & sample checks: Laser Engraving
Consider it for
Consider laser engraving for a restrained logo, individual names or fine line artwork on a suitable metal body. On many coated stainless steel tumblers, the laser removes the surface coating to reveal the metal beneath.
Confirm before choosing
The visible result depends on the metal, coating and laser process; engraving does not automatically reproduce a brand colour. Curvature, taper and artwork width also affect positioning and consistent focus.
At BG Drinkware
Engraved on BG Drinkware’s own laser machines, on powder-coated, spray-painted or bare stainless steel. From about USD 0.035 per piece, depending on the logo.
View process-equipment photo for Laser Engraving (full size, opens in a new tab)
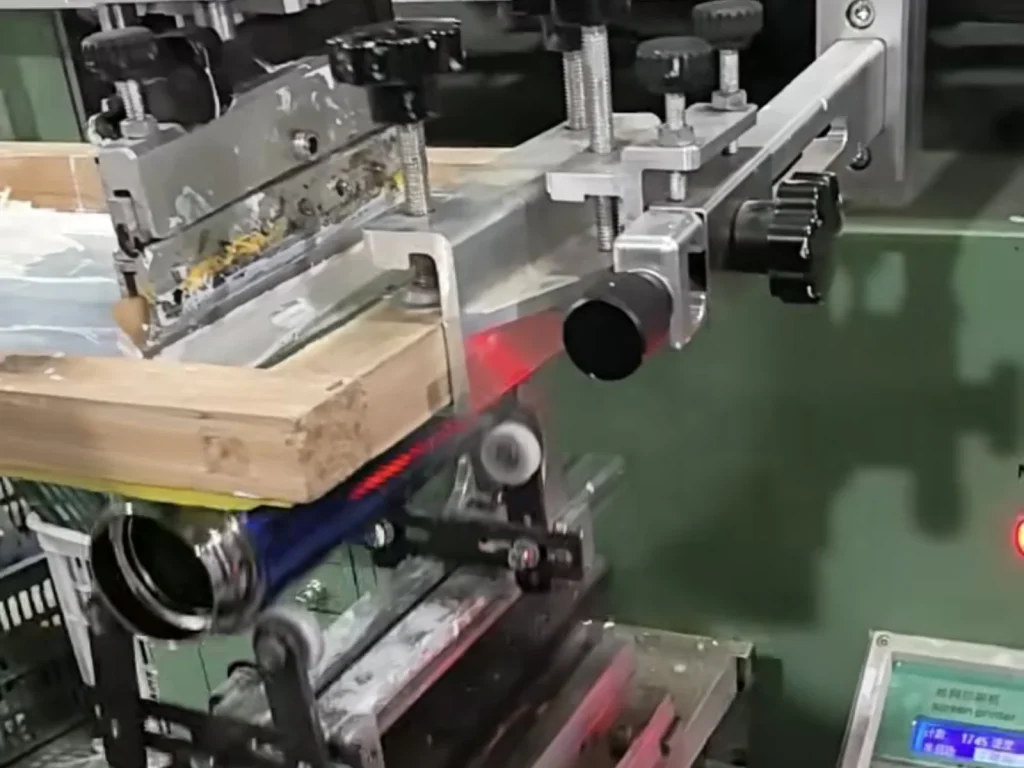
Screen printing equipment positioned over a cylindrical drinkware body

Screen Printing

Print logos in individually specified colours rather than photographic images.
Fit, limits & sample checks: Screen Printing
Consider it for
Screen printing is worth comparing for repeat logos, short lettering and solid colour shapes. The artwork is separated into printable layers, making colour count and alignment important when assessing a multi-colour design on a curved body.
Confirm before choosing
Fine lines, small gaps and aligned colours need a print trial. Match the ink and curing process to the actual surface. Curing sets the ink; a good result on a different cup does not confirm compatibility.
At BG Drinkware
From about USD 0.035 per piece, depending on the logo. Works on bare stainless steel as well as coated bodies.
View process-equipment photo for Screen Printing (full size, opens in a new tab)
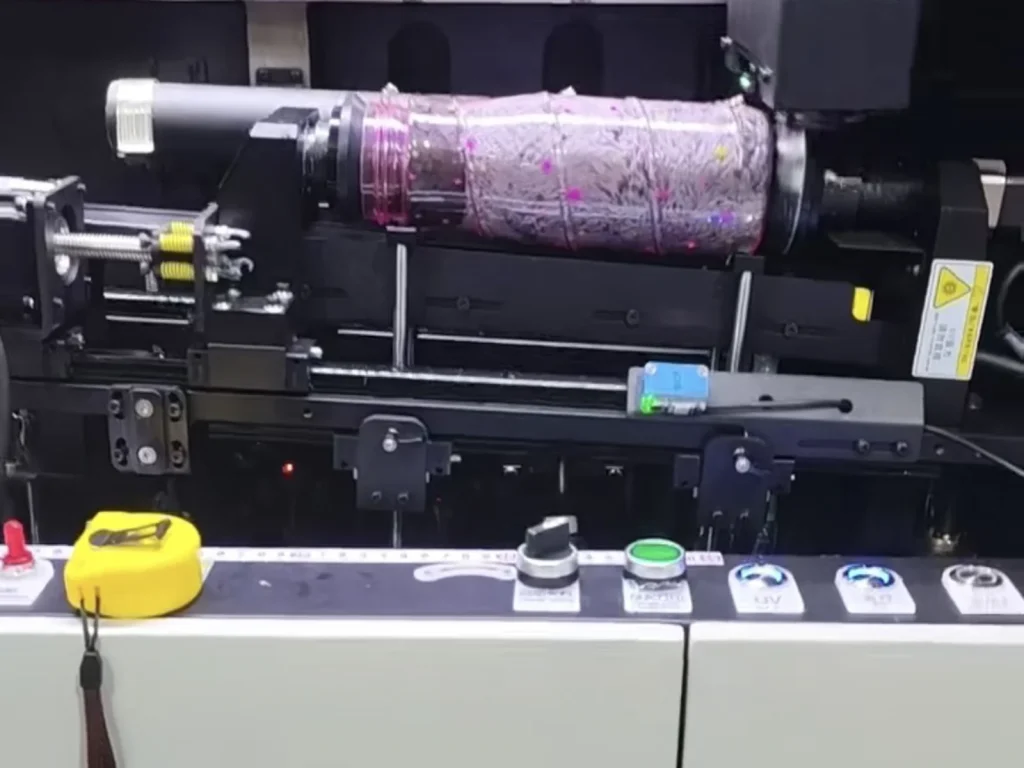
Cylindrical drinkware held in a rotary UV printing machine

UV Printing

Print multi-colour artwork directly onto a compatible exterior with controlled placement on a prepared surface.
Fit, limits & sample checks: UV Printing
Consider it for
Consider UV printing for detailed graphics and blended colours. Dark or clear surfaces may need white ink underneath. Include that layer and its alignment with the artwork in the sample specification.
Confirm before choosing
UV curing sets the ink but does not guarantee it will bond to the surface. Some surfaces need cleaning, treatment or a primer coat to help adhesion. Cup shape and equipment determine the print area.
At BG Drinkware
From about USD 0.20 per piece. Needs a powder-coated or spray-painted body; bare stainless steel cannot be UV printed. Most of BG Drinkware’s finished printed designs are UV printed.
View process-equipment photo for UV Printing (full size, opens in a new tab)

Mimaki: UV ink adhesion and substrate preparation

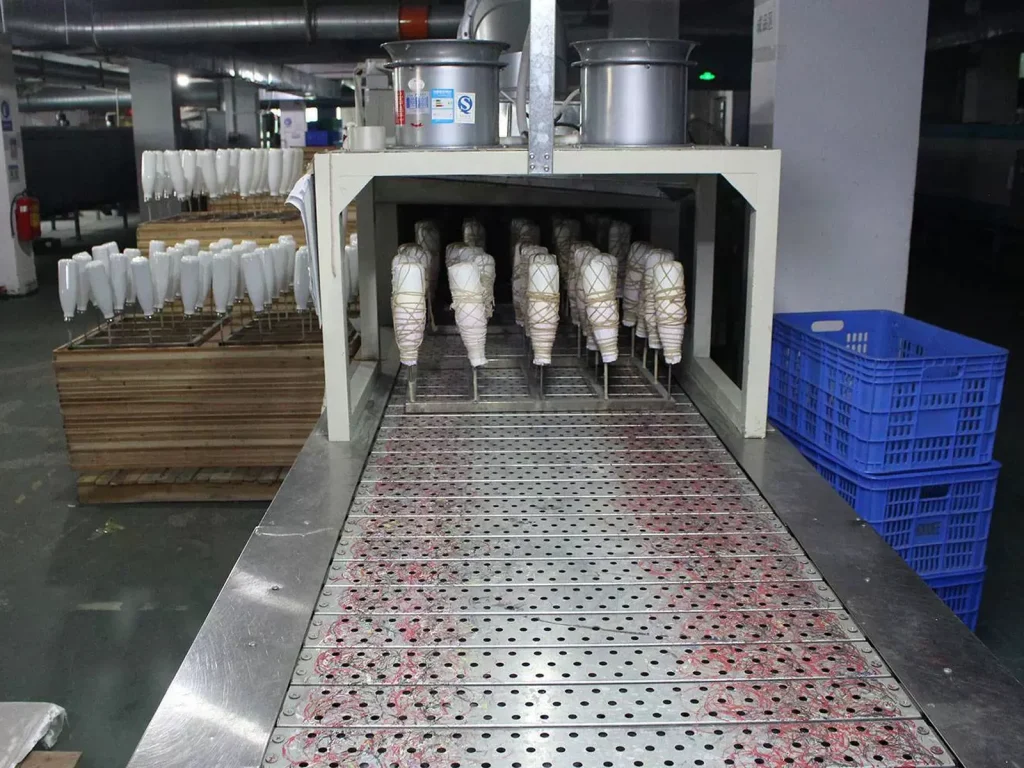
Wrapped drinkware bodies entering a heating tunnel on a conveyor

Dye Sublimation

Transfer photographic colour and wraparound artwork into a compatible sublimation coating rather than an untreated metal surface.
Fit, limits & sample checks: Dye Sublimation
Consider it for
Dye sublimation suits photographs and full-colour layouts on drinkware prepared for this process. Heat transfers compatible dyes into a suitable polymer coating. Select the undecorated cup together with the artwork, not afterwards.
Confirm before choosing
An ordinary painted or bare stainless steel cup is not automatically sublimation-ready. Taper, transfer contact and heating conditions influence colour consistency, and an artwork proof on paper cannot replace a decorated sample.
At BG Drinkware
From about USD 0.15 per piece. Prints only onto a sublimation coating, which is applied by BG Drinkware’s outside coating partner; the most common blank is the 20 oz straight tumbler.
View process-equipment photo for Dye Sublimation (full size, opens in a new tab)

Sawgrass: sublimation inks and compatible materials

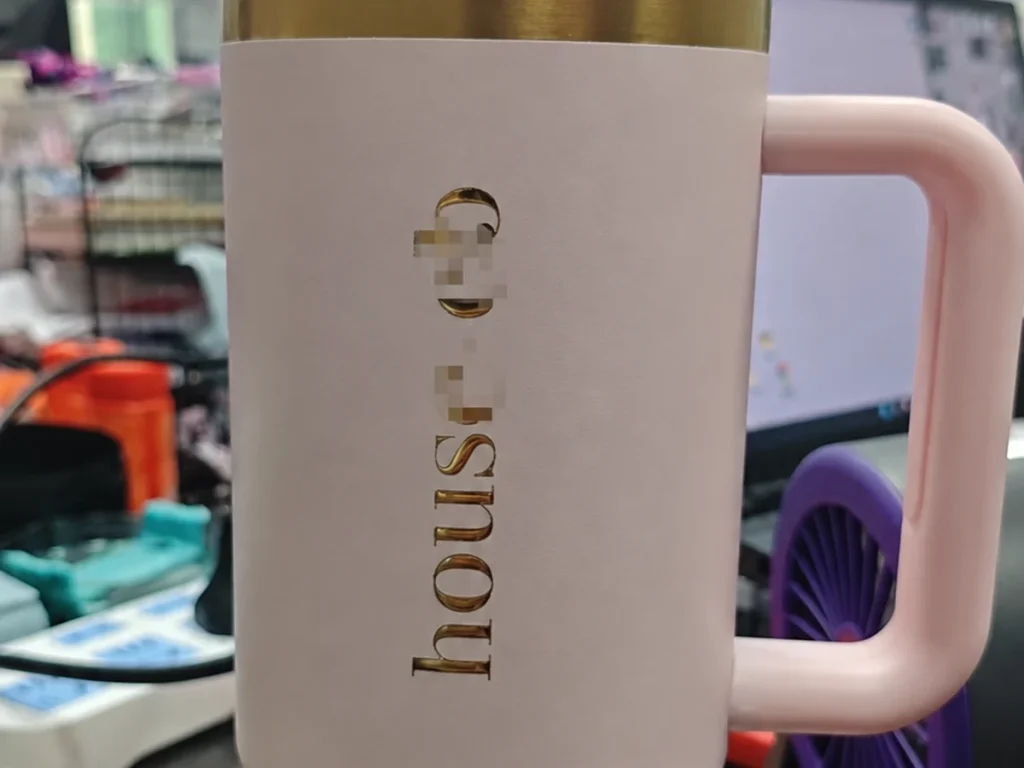
Pink handled tumbler with reflective gold foil lettering and partially obscured branding

Hot Foil Stamping

Add reflective lettering or compact decorative accents where metallic shine is central to the design.
Fit, limits & sample checks: Hot Foil Stamping
Consider it for
Hot foil stamping can give a logo or lettering a reflective metallic appearance. Heat and pressure transfer a decorative layer from a carrier onto a compatible surface; the foil grade, tooling and coated body need to be considered together.
Confirm before choosing
A gold-coloured effect describes appearance, not precious-metal content. Rough texture, tight curves and very fine strokes can complicate transfer, so the proposed coverage and surface compatibility need a physical trial.
Check the sample
Tilt the sample to inspect brilliance, missing areas and broken letter edges. Confirm foil colour, position and agreed adhesion or rubbing checks on the finished coating.
View finished-surface photo for Hot Foil Stamping (full size, opens in a new tab)

KURZ: the hot stamping process

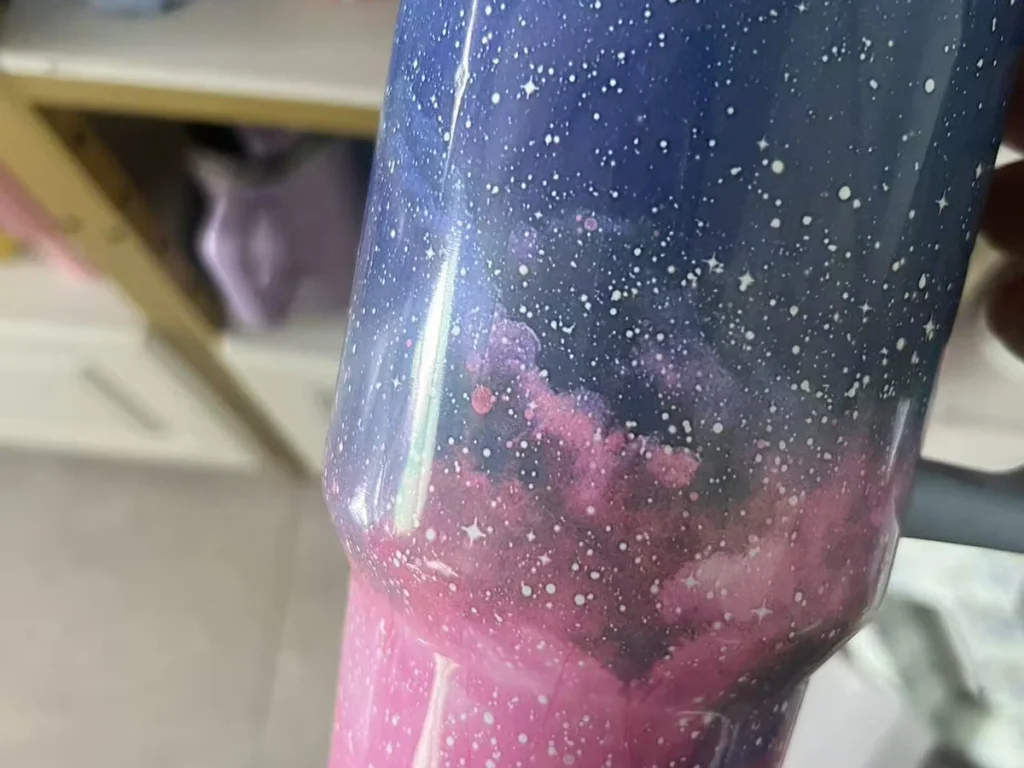
Blue and pink galaxy pattern applied to a tumbler using water transfer printing

Water Transfer Printing

Wrap patterns around a shaped body when coverage matters more than placing each motif in exactly the same position.

Fit, limits & sample checks: Water Transfer Printing
Consider it for
Water transfer printing carries a pattern from a film floating on water onto the prepared body. It is useful for all-over decorative effects, such as the galaxy-patterned tumbler pictured here, with the base colour and protective finish contributing to the appearance.
Confirm before choosing
Do not assume that every repeat of the pattern will land in exactly the same position. Review transitions around curves and meeting edges; use a separately controlled mark when precise logo placement is essential.
Check the sample
Inspect pattern scale, distorted areas, gaps and the meeting line around the body. Confirm the base colour, final gloss and coating checks with the chosen film and cup geometry.
View finished-surface photo for Water Transfer Printing (full size, opens in a new tab)

Taica: how hydrographic pattern transfer works

02 / Colour & coating

Agree the base colour, sheen and feel before adding artwork.
Drinkware bodies moving through a coating booth on rotating holders

Powder Coating

Build a consistent exterior colour and surface feel using a powder system matched to the metal body.
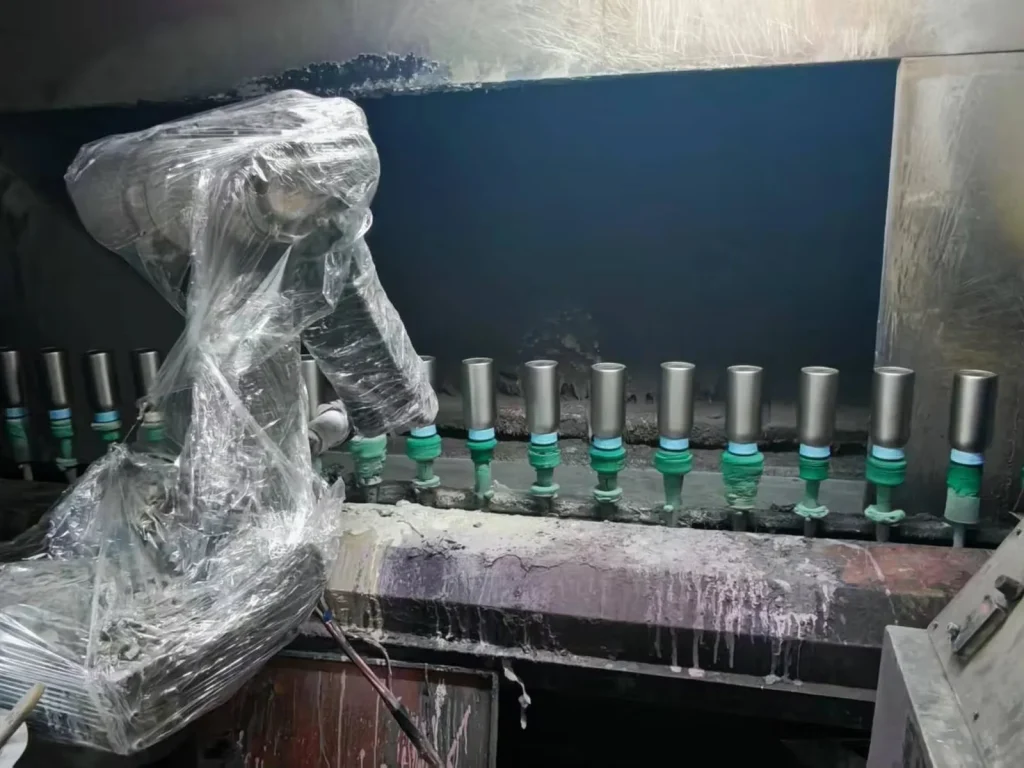
Fit, limits & sample checks: Powder Coating
Consider it for
Powder coating is a starting point for solid-colour metal drinkware with a selected gloss or texture. It creates the background for the product design; any later printing or laser marking should be reviewed as part of the complete finish.
Confirm before choosing
The powder name alone does not establish performance. Surface preparation, coating application and the specified cure all matter, and assembled heat-sensitive components may need a different production sequence.
At BG Drinkware
Applied in-house. Colours are matched to a Pantone reference or colour card, and shade can vary slightly between batches.
View process-equipment photo for Powder Coating (full size, opens in a new tab)
Robotic spray painting equipment beside a row of metal drinkware bodies

Spray Painting

Specify a liquid-applied colour system with the gloss, coverage and layer sequence your design requires.
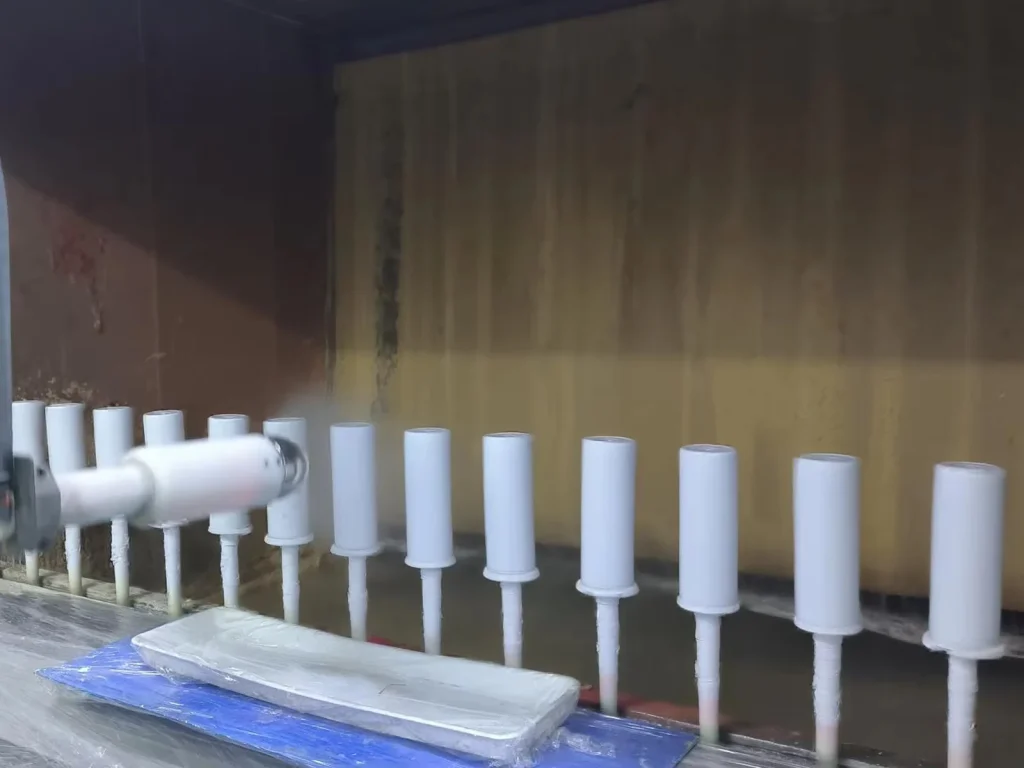
Fit, limits & sample checks: Spray Painting
Consider it for
Spray painting offers a route for exterior colours and layered visual effects when the selected liquid coating is compatible with the body. A physical colour sample helps align purchasing, product and production teams on the intended result.
Confirm before choosing
A matching colour name does not guarantee matching gloss or appearance. Primer, colour and clear layers must work together; the complete coating system and curing conditions need confirmation for the selected substrate.
At BG Drinkware
Applied by BG Drinkware’s outside coating partner. In BG Drinkware’s experience spray paint has more finish problems than powder coating; bubbling usually comes from the curing temperature.
View process-equipment photo for Spray Painting (full size, opens in a new tab)
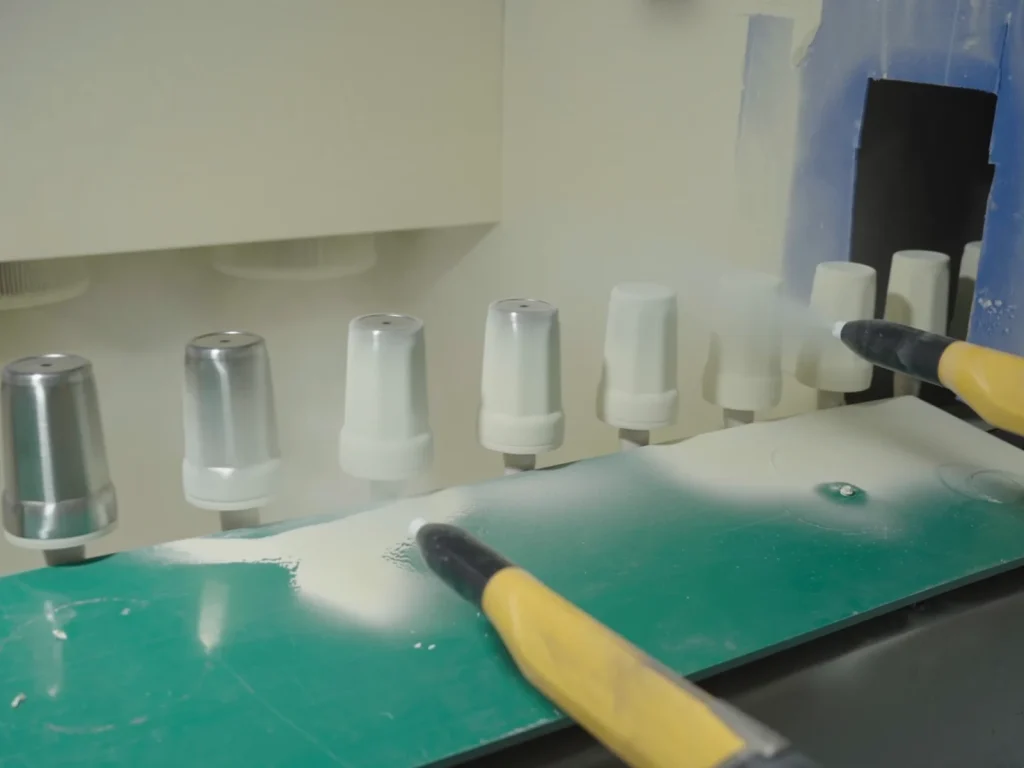
Spray nozzle applying a white coating to drinkware bodies on rotating holders

Soft-Touch Coating

Specify a softer surface feel through a validated coating system, not through appearance alone.
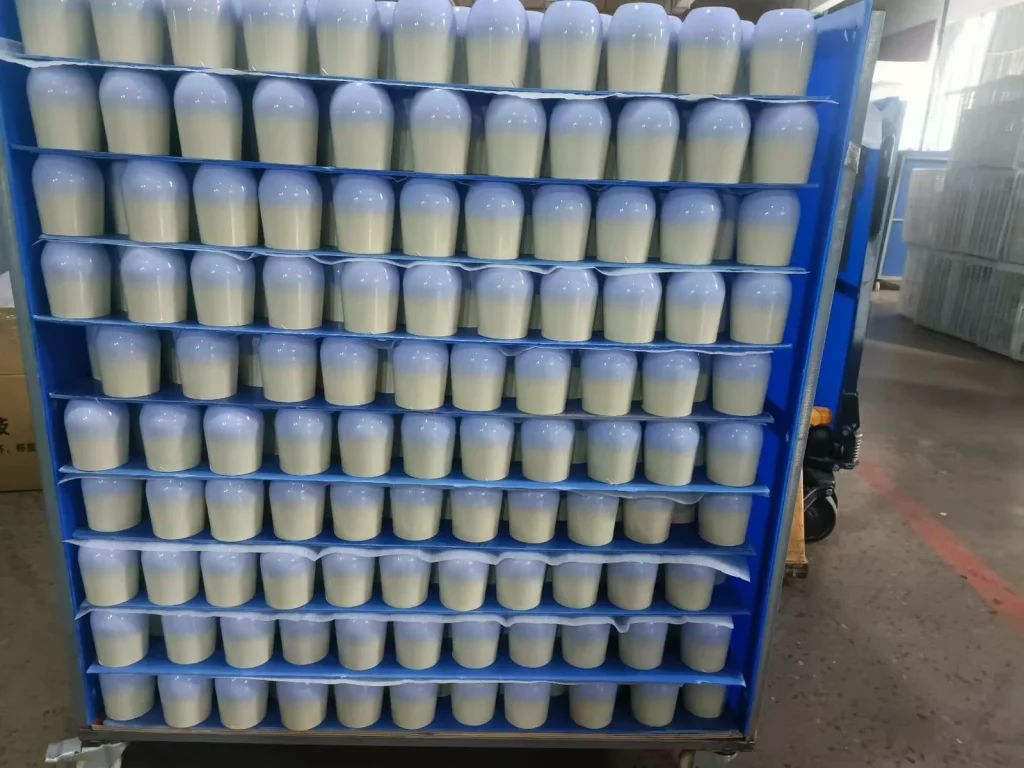
Fit, limits & sample checks: Soft-Touch Coating
Consider it for
Soft-touch coating is considered when the hand feel is an important part of the drinkware design. Buyers should handle a finished sample and describe the preferred feel, since a photograph cannot establish softness, friction or the coating formulation.
Confirm before choosing
Soft-touch and rubber coating are not precise formula specifications. Confirm compatibility with the underlying finish, intended cleaning products and use conditions instead of assuming that all coatings sold under these names behave alike.
At BG Drinkware
Rubber paint applied by the outside coating partner; the logo can be screen printed, UV printed or laser engraved.
View process-equipment photo for Soft-Touch Coating (full size, opens in a new tab)
Rows of drinkware with blue-to-white gradient finishes on a storage rack

Gradient Finish

Blend two or more colours while controlling the transition position, direction and appearance across the body.

Fit, limits & sample checks: Gradient Finish
Consider it for
A gradient finish suits a product line built around blended colour rather than a single solid shade. Define the start colour, end colour, direction and transition zone so the factory can sample the intended effect on the chosen shape.
Confirm before choosing
Gradient is a visual effect, not one universal coating chemistry. A flat digital mockup cannot fully predict the blend on a curved cup, and acceptable transition variation should be agreed before a production run.
Check the sample
Line up samples to compare transition height, blend softness and colour balance. Check the entire circumference and confirm whether a logo must sit within a particular colour zone.
View finished-surface photo for Gradient Finish (full size, opens in a new tab)

03 / Decoration & texture

Compare sparkle, raised detail and surface feel.
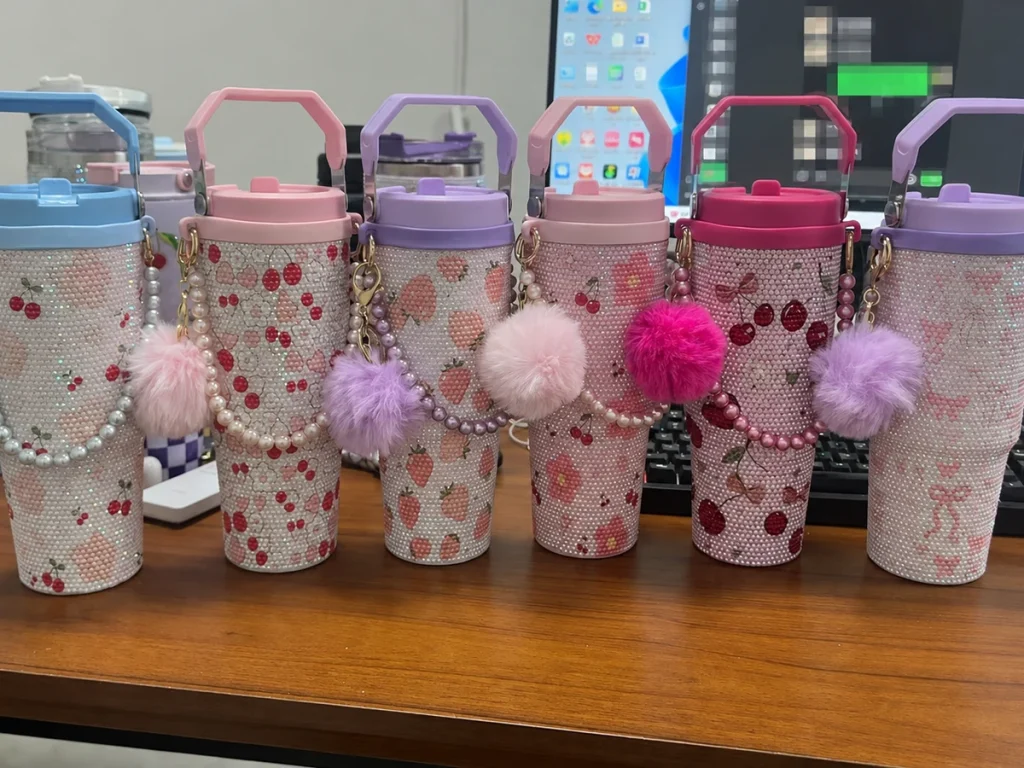
Rhinestone-covered tumblers with pastel handles, fruit patterns and decorative bead chains

Rhinestone Decoration

Create a sparkling, raised exterior with a planned stone layout and clearly defined undecorated areas.
Fit, limits & sample checks: Rhinestone Decoration
Consider it for
Rhinestone decoration is relevant to gift and fashion-led drinkware where sparkle and tactile detail are priorities. Specify stone colour, size, coverage and arrangement, then check the design together with handles, lids, accessories and the intended protective packaging.
Confirm before choosing
The attachment system, finished dimensions and care requirements need to be confirmed separately. Raised decoration can affect handling and packing clearance; do not infer wash resistance or suitability for children from appearance alone.
Check the sample
Inspect missing stones, uneven spacing and exposed attachment material. Agree a retention check and review the packed sample for rubbing, detached decoration and contact between accessories.
View finished-surface photo for Rhinestone Decoration (full size, opens in a new tab)
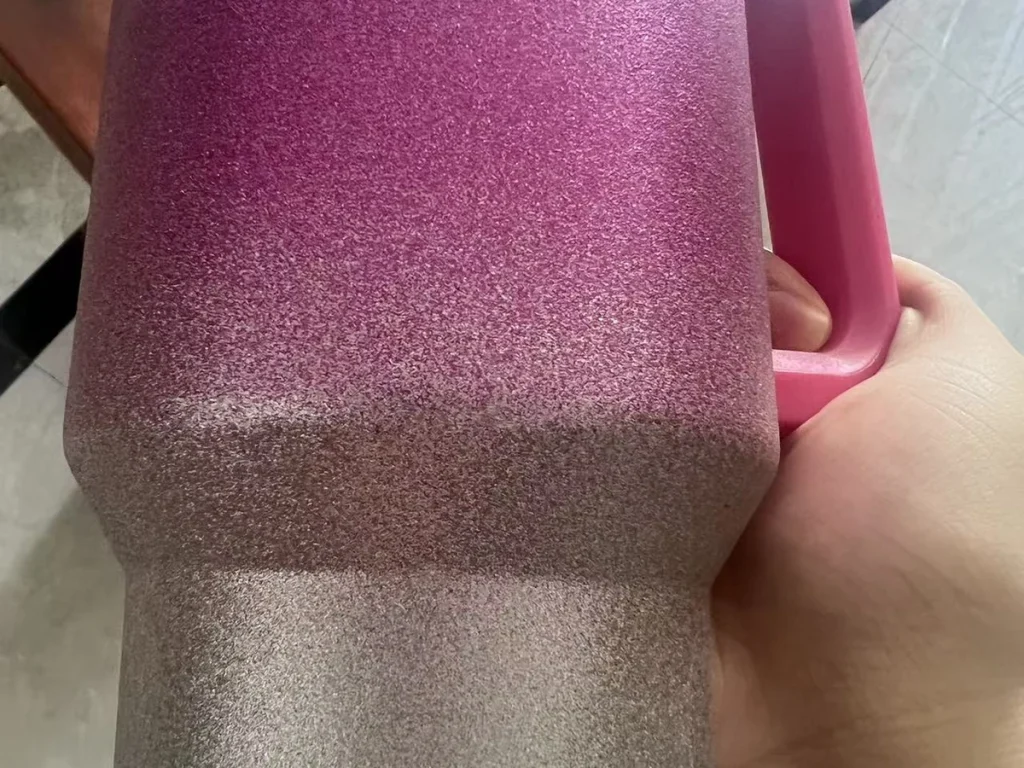
Close-up of a handled tumbler with a pink-to-silver glitter finish

Glitter Finish

Choose a sparkling surface by specifying particle appearance, colour balance and the finished surface feel.
Fit, limits & sample checks: Glitter Finish
Consider it for
Glitter finishes suit designs where reflective sparkle should remain visible as the cup moves. Request a sample showing the intended particle size and density; photographs taken under different lighting can make the same finish appear much stronger or quieter.
Confirm before choosing
Glitter describes an effect rather than a single material recipe. The base colour, particle system and any protective layer influence appearance and feel, so they are judged as one finish.
Check the sample
Inspect sparkle under both diffuse and directional light. Check coverage, surface roughness and particle retention, then assess whether the selected packaging leaves visible contact marks.
View finished-surface photo for Glitter Finish (full size, opens in a new tab)
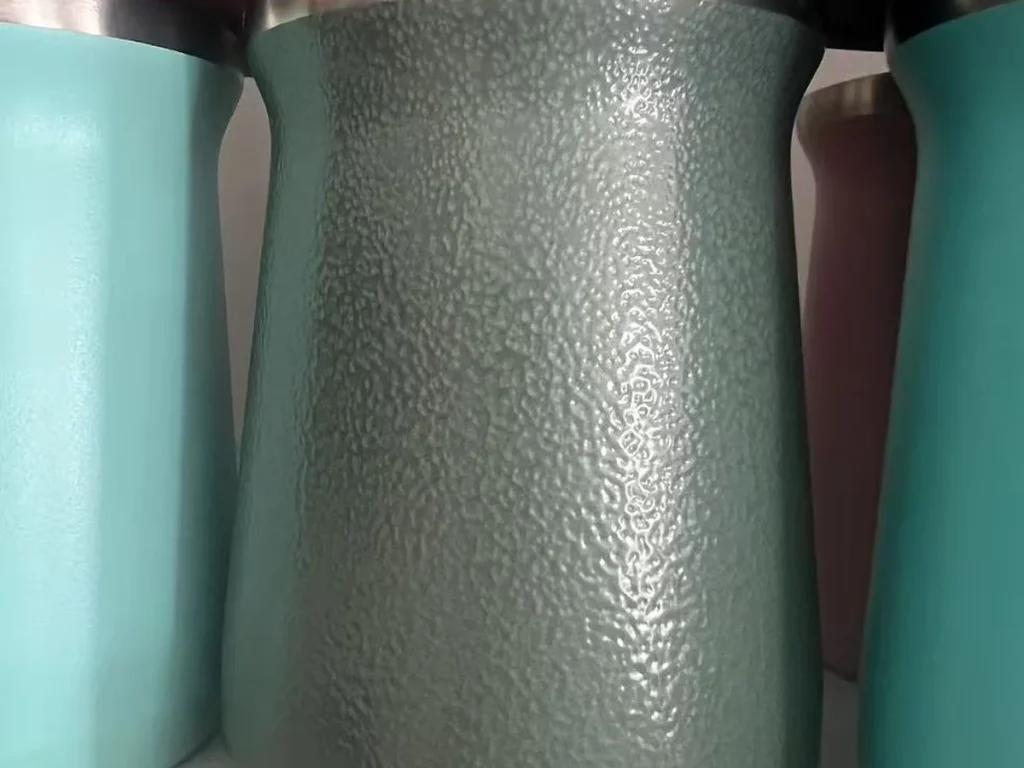
Grey-green drinkware body with a hammer-tone textured finish and stainless steel rim

Hammer-Tone Finish

Use a patterned textured coating to give the exterior a hammer-tone appearance without implying hand-forged construction.

Fit, limits & sample checks: Hammer-Tone Finish
Consider it for
Hammer-tone finishes suit drinkware that calls for a visibly textured exterior rather than a smooth painted surface. Define the texture scale, colour and gloss using a physical sample, particularly when matching different body shapes within the same range.
Confirm before choosing
A hammer-tone coating is not proof that the metal body was mechanically hammered. Texture can also change how a printed logo looks, so the finish and branding method should be sampled together.
Check the sample
Compare texture distribution around the body, especially near the rim and base. Check colour, gloss and logo clarity, and keep a reference sample to compare later production against.
View finished-surface photo for Hammer-Tone Finish (full size, opens in a new tab)

A practical shortlist

Compare processes by what your design needs.

No method wins every brief. Use this comparison to narrow the options, then review a physical sample. Product shape, surface chemistry and artwork detail can change the recommendation. See three illustrative briefs →

Starting points for discussion, not blanket compatibility or durability guarantees. Scroll sideways on smaller screens.
Design priorityConsiderThe deciding check
A contrasting mark on a coated metal bodyLaser engravingActual contrast, small lettering and edges on the chosen coating; not a printed brand colour.
A logo with individually specified ink coloursScreen printingColour separation, alignment between colours and usable print area on the curve.
Detailed, full-colour artworkUV printing or dye sublimationUV: ink-to-surface compatibility. Sublimation: a suitable polymer-coated cup and confirmed heating conditions. Check colour and wrap seam.
Metallic artwork or a reflective accentHot foil stampingFoil compatibility, transfer completeness and edge definition on the actual surface.
A pattern following a shaped surfaceWater transfer printingPattern stretching, join placement and appearance around the shoulder or taper.
Base colour, sheen or a blended colour transitionPowder coating, spray painting and gradient effectsPowder coating and spray painting are coating methods; a gradient is a colour effect. Review colour, gloss, feel and the logo together, including any areas left undecorated.
Tactile feel, sparkle or visible reliefSoft-touch, glitter, hammer-tone or rhinestonesFeel, cleaning requirements, edges and attachment or surface wear under the agreed use conditions.

From flat artwork to a curved body

What a sample shows that a mock-up cannot.

A digital layout places the artwork, but reflection, feel, the wrap seam and the way a logo changes around a curved body only show on a physical sample. A sample of an existing model takes up to 7 days; samples are charged, and the charge is credited against the bulk order. See sampling, and for print durability read why printed logos rub off tumblers.

  • Mark and contrast: inspect edges, small lettering and visibility against the final colour.
  • Coverage and position: compare the front, reverse, shoulder and base, and note any seam or area left plain.
  • Care and handling: cross-cut and dishwasher tests can be run on the sample on request.
Connect appearance checks with quality control →
Black tumbler with a partially obscured ram design, pixelated lettering and a stainless steel rim
Check logo edges and contrast against the textured finish. View logo detail photo (full size, opens in a new tab)
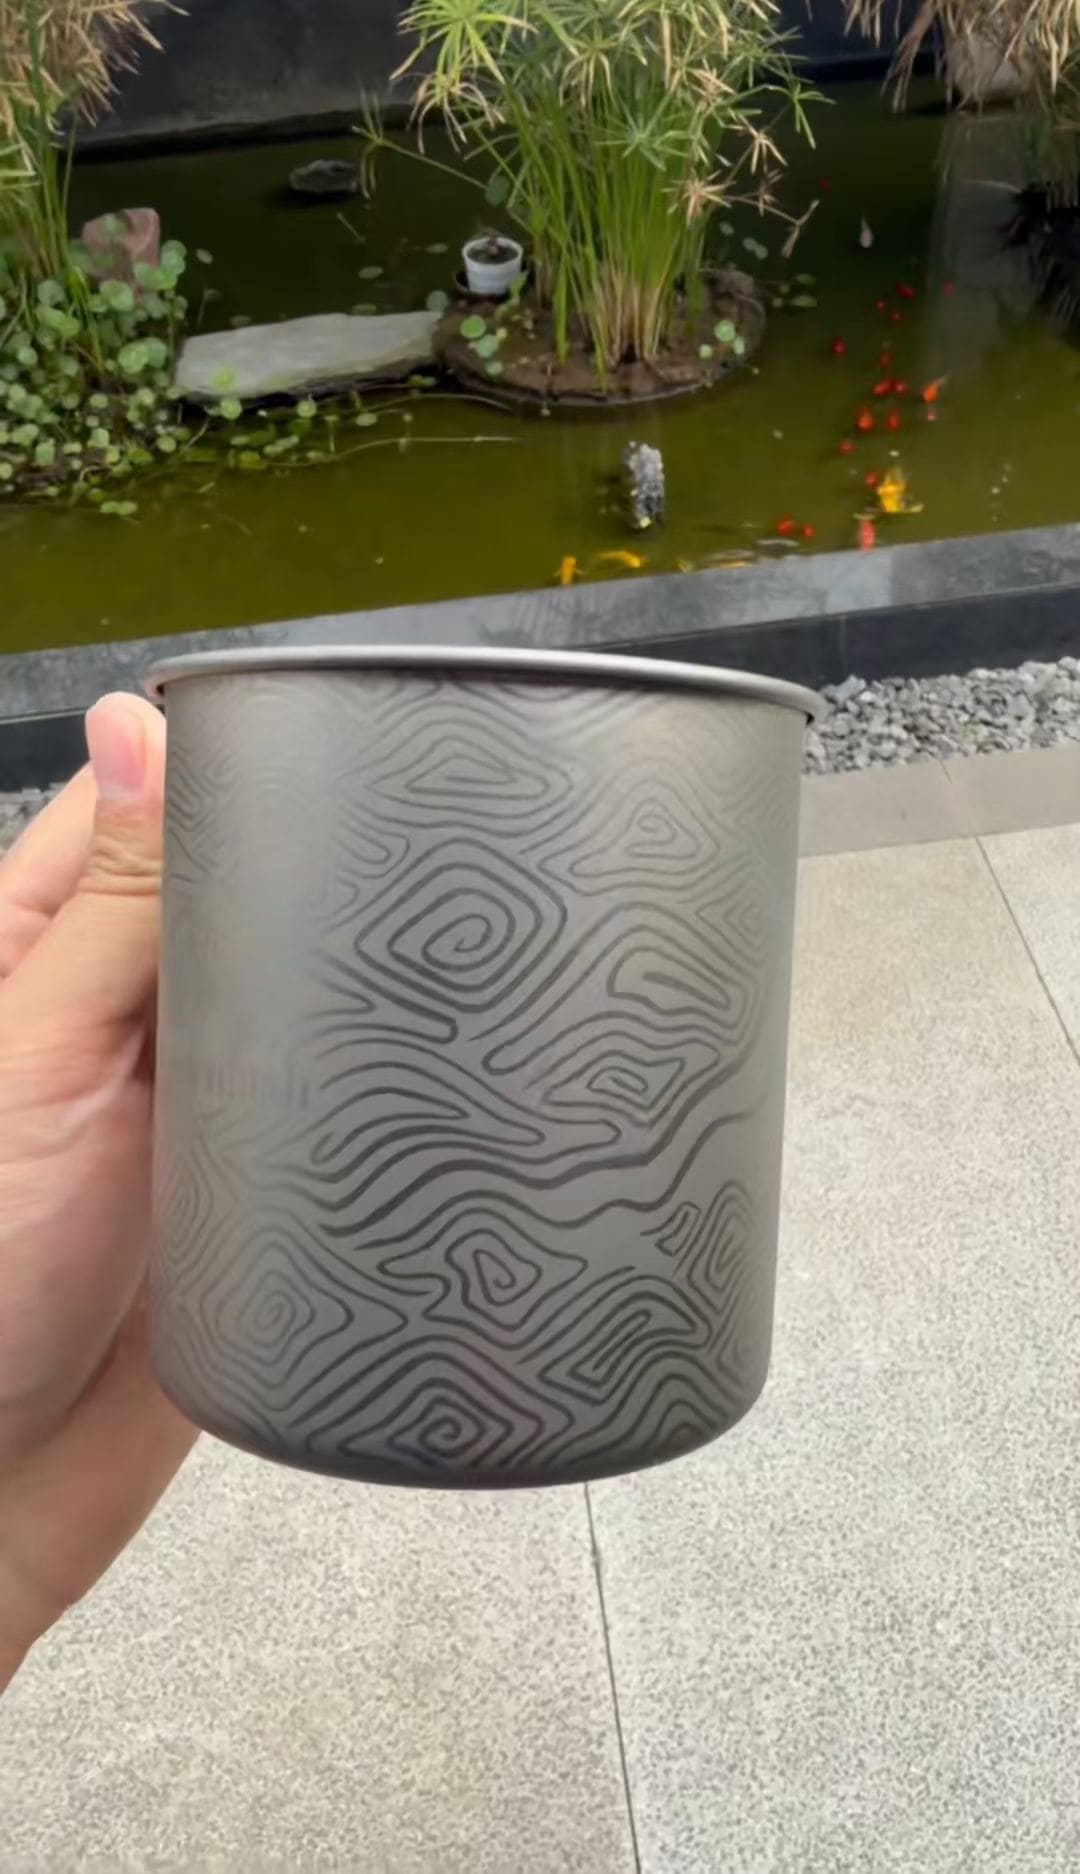
Grey drinkware body decorated with a contour-line pattern
Check pattern placement around the curve and confirm the application method for your sample. View pattern detail photo (full size, opens in a new tab)

A sample-ready brief

Send the artwork with the product specification.

Send the product reference, artwork and intended use together. Include an editable vector file with a dimensioned review copy, or the original photographic artwork at its intended print size—not a screenshot.

For individually specified ink colours (spot colours), have your designer check each colour layer and its reference. Adobe’s colour-separation guidance explains the artwork setup; confirm the production file requirements with the project team.

Keep the comparison fair. Quote the same body, artwork version, coverage and quantity split to each supplier. Adding colours, changing the decorated area or dividing an order into more designs can change setup and handling requirements.

  1. Product and surface

    Product reference, capacity, body material, coating or finish, and any area that must stay undecorated.

  2. Artwork and placement

    Editable artwork, a viewing copy, logo dimensions and position measured from a repeatable feature on the body.

  3. Colour and texture

    Colour references, gloss preference, physical samples where available, and the transition direction for a gradient.

  4. Quantity and variants

    Units per design and colour, sample needs, destination market, desired timing and retail packaging requirements.

  5. Use and approval criteria

    Expected handling and cleaning, required sample checks, and who signs off the result.

Turn a design idea into a clear brief

Compare the complete finish, not just the logo.

The project below shows one customer’s finish preference. The three illustrative briefs are planning examples, not completed customer projects.

A BG Drinkware project

From spray paint to powder coating.

A BG Drinkware customer requested spray paint with a UV-printed logo, then chose powder coating because the combined surface feel did not match their personal preference. This was an individual finish choice—not evidence that spray paint and UV printing are generally incompatible.

Judge how the finish and logo feel together on your own decorated sample.

Illustrative brief

A single-colour brand mark

On a smooth painted tumbler, compare screen printing for a specified ink colour with laser engraving for a contrasting mark. Check the result on the actual coating, including the smallest lettering.

Illustrative brief

A full-colour wrap

For a photographic wrap, compare UV printing with sublimation on a suitable coated cup. Check the joining seam and colour near the shoulder and base, where the shape can change the result.

Illustrative brief

A textured finish with a logo

Choose the texture and logo method together. Ask whether the artwork needs larger lines or an undecorated area. Approve the complete decorated sample and its packaging contact points, not separate colour and logo samples.
Six terms you may see in a decoration quotation
Substrate
The surface receiving the decoration: for example, bare metal or an existing coating.
Registration
The alignment of printed colours or layers with each other and the intended position.
Primer
A preparatory layer selected to help the following ink or coating bond to the surface.
Curing
The specified process that sets or hardens an ink or coating; it does not itself prove suitability for washing.
White underlayer
White ink beneath the colour artwork, used when the background would otherwise change its appearance.
Masked boundary
The edge of an area deliberately protected from coating or decoration.
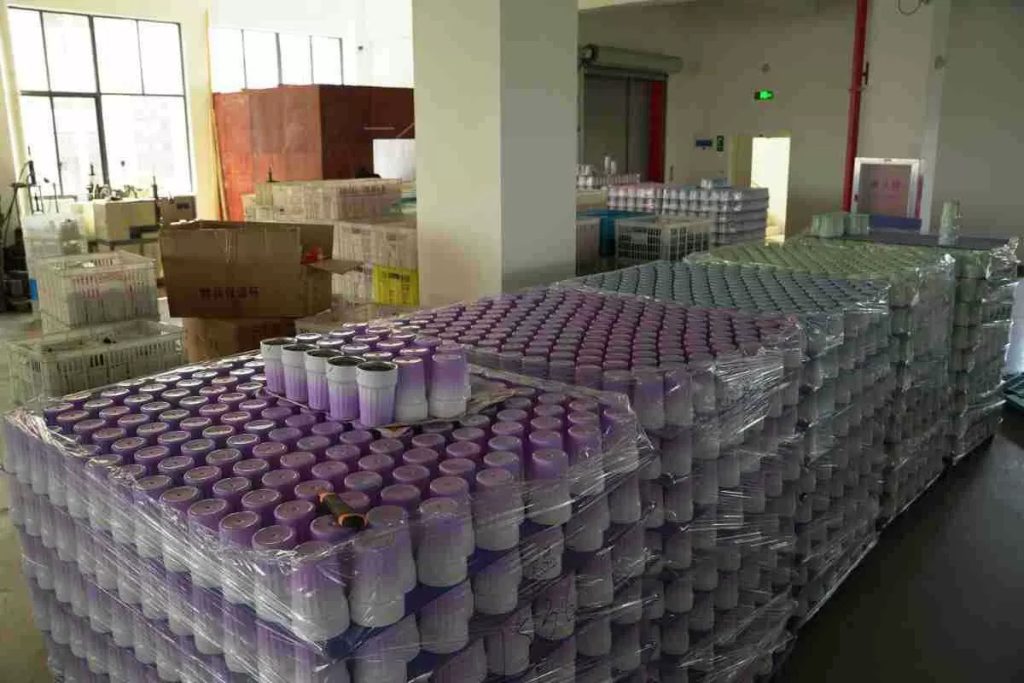
Rows of purple and white drinkware arranged in grouped batches
Compare the finish across multiple pieces, not only one selected sample.

From sample to bulk

From sample to bulk order.

Bulk production takes 7–12 days after the sample is approved, or 2–3 days more with a ceramic lining. Bulk orders are inspected to ISO 2859-1, general inspection level II, AQL 2.5 for major and 4.0 for minor defects, and third-party inspection by SGS, QIMA or your own QC is welcome.

  • Changing the colour, an existing lid or the logo needs no new mould; only a new body or part does.
  • Coating colour can vary slightly between batches, which is normal.
  • Check that contact points in packaging protect the decorated areas during handling.
Follow the manufacturing route →

For guide prices per piece for each logo method, see custom drinkware costs.

Buyer questions

Before you approve a finish.

Practical answers for comparing drinkware customization options and preparing a project brief.

Back to the process library ↑
Which process should I choose for custom tumblers with a logo?

Start with the result, not a preferred machine. A contrasting mark on a coated metal tumbler may suit laser engraving; a logo in specified ink colours may suit screen printing; detailed colour artwork may lead to UV printing or sublimation on a suitable coated cup. Compare the actual body, coating, artwork size and intended care before committing to a route.

Can one tumbler combine a coloured finish and a logo?

Yes. Most tumblers are coloured first and the logo goes on afterwards: UV and screen printing sit on top of the coating, and laser engraving cuts through it to the steel. Judge the colour and the logo together on a finished sample.

Will a digital colour reference match the finished cup exactly?

Not exactly. Texture, gloss and lighting change how a colour looks, so BG Drinkware matches coatings to a Pantone reference or a physical colour card and confirms the colour on the sample. For a gradient, check where the blend starts and ends.

Can you confirm dishwasher safety from a finish name?

No. A process name or photograph does not establish care performance. The body, coating, decoration and attachment system must be assessed together against the intended cleaning conditions. Tell BG Drinkware how the product will be used and cleaned, and agree the relevant sample checks before making a care claim on packaging. Do not assume every decorated product shares the same instructions.

What affects customization cost and minimum quantities?

Artwork setup, colour count, decoration coverage, tooling, surface preparation and the number of product or colour variants all influence a quotation. A total quantity split across several designs may not be treated like one repeated design. Send quantities per version and the desired finish together. Request project-specific minimums, sample costs and timing rather than assuming a universal threshold.

What should be approved before bulk production?

The finished sample: body, coating colour, logo size and position, and packaging. A sample of an existing model takes up to 7 days, and bulk production takes 7–12 days after the sample is approved.

Bring the design. Define the details.

Build your customization brief.

Start with the product and the result you want. Add quantities per version, the main process and any second finish or logo method. If you are unsure, leave the process as “Please advise”. Use sampling to confirm decoration on a physical sample before locking the process.

  1. Prepare: fill in what you know; leave the rest for discussion.
  2. Review: copy or download the brief and add your artwork files separately.
  3. Send: use the quotation page or email BG Drinkware. Ask for project-specific sample costs and timing.
Check the sample approval record →

One order. One responsible contact.

The salesperson responsible for your BG Drinkware order is also responsible for artwork confirmation, process review and sample approval. Keep revised artwork, process questions and sample feedback with that same contact.

Ask for written confirmation of the artwork version and sample decision. Keep your own approval requirements explicit; a supplier's internal sign-off does not replace any buyer approval agreed for the order.

Artwork, use and timing (optional)

Add artwork dimensions, colour references, cleaning needs, destination, timing and packaging. For a tactile finish, describe the preferred feel and provide a physical reference if available.

This tool does not send or save your entries. Copy or download your brief before leaving, then send it with your artwork through Request a Quote or email.